

So, you’re struggling to keep your Midjourney characters consistent in every scene of your creations?
Well, fear not!
Not only will you learn how to create consistent characters in MidJourney, but you’ll also learn:
- How to change your character’s outfit
- How to change the activity they’re doing
- How to get multiple consistent characters
- How to completely change the design style of your character.
Let’s get to it.
Creating a Character
First things first, we need to create our character.
To do this, we’re going to use the MidJourney web app, which recently became accessible to everyone.
This is going to be our character reference image and the foundation of all our other images.
To do this, we need to make sure that we’re using, clear, and specific prompts, as this will guide MidJourney in creating the character that we want.
Here’s a quick breakdown of key prompt elements that will allow you to create your desired character.
- Type of shot – I suggest a long shot for the character reference image as this increases the chances that your character’s full body is in the image
- Physical appearance – age, height, build, face shape, and skin tone.
- Hair and eye details – eye color, hair color, texture, and length.
- Clothing – outfit, color, materials, and any other accessories that they’re wearing.
- Character activity – essentially what are they doing in this image?
- Setting – where are they?
- Style – e.g. anime, comic book style, Disney Pixar style, or photo-realistic.
With that in mind, you can use a prompt template like this.
A [type of shot] [age] [gender], [general description (e.g. height, build], with [eye, hair color, and style], wearing [specific description of clothing], doing/performing [action] in [setting]. [style]*
So, let’s put the prompt into practice by creating a character for a kid’s animation.
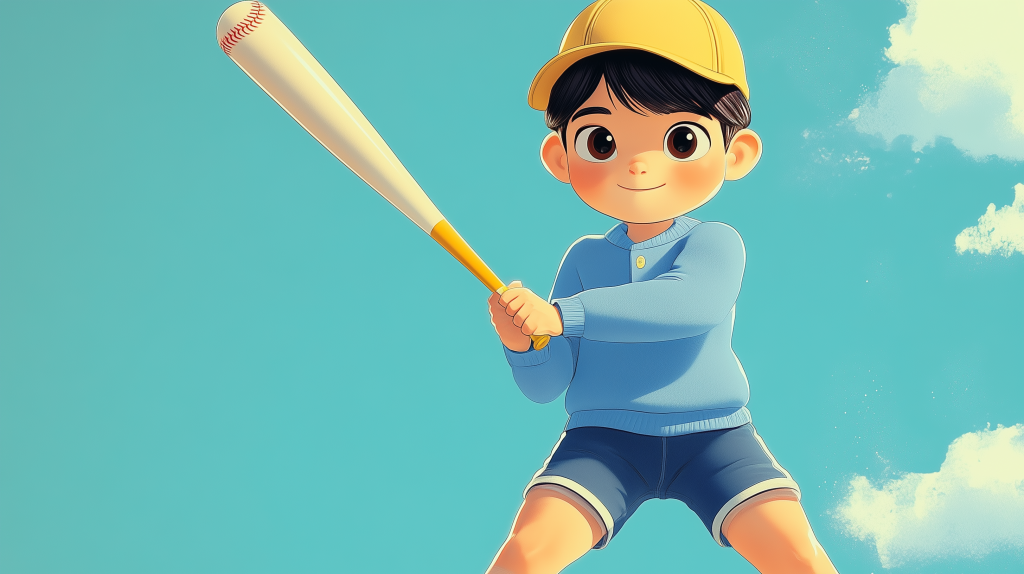
A long shot of a 12-year-old boy, of average height and build, with short dark hair and brown eyes, wearing a blue jumper and shorts with a plain yellow baseball cap, standing in a park. Disney Pixar style.
Great let’s put this prompt into MidJourney, and see what we get.
I’d also suggest playing around with a few different aspect ratios, as this will change the overall type of shot you get.
Pick an image that you like, and select subtle upscale.

Once that’s upscaled, go ahead and download it and move on to the next step.
If you’d like a more in-depth tutorial, I’d recommend checking out MidJourney character design guide for a full breakdown and a ton of example prompts.
How to Create a Consistent Character in MidJourney
Okay, for the fun part, making your character consistent across your MidJourney image creations.
But before we begin, there’s an important parameter that we need to discuss…
And that’s character weight, expressed as –cw at the end of your prompt.
We can then input a number between 1 and 100. For example, –cw 100.
If we put a character weight of 100, that will inform MidJourney to strictly adhere to the character’s style, including their face, hair, and clothing.
A character weight of 0 will still maintain a resemblance in the face, however, a lot of their other features such as their clothes will change.


MidJourney automatically sets the character weight as 100, so we don’t need to worry about changing anything here, as we’re looking to get the same character in every one of our images.
Ok, let’s put our newly created character into some scenes.
Click on this image button and upload the character reference image.

Select the character icon on the image

Type in our prompt using the same structure as before.
A 12-year-old boy, of average height and build, with short dark hair and brown eyes, wearing a blue jumper and shorts with a plain yellow baseball cap, sitting on a park bench eating a sandwich. Disney Pixar style.
Hit enter, and then we can see what MidJourney creates.

Nice, as we can see, we’ve got a pretty consistent character across all of our images.
But, what if we want to change something about our character?
Well, MidJourney has an awesome image editor tool that we can use.
Editing Your Character in MidJourney
Let’s use this image here as an example, and say we don’t like the hat our character is wearing.

So let’s change it.
Click the image, and next to more, click editor.

Now we can highlight specific areas that we want to change. Everything else in the image will stay the same, except the area that we highlight.

We can also adjust the scale of the brush with the slider at the top.
With that selected, we can adjust the prompt to reflect the changes we want to see.

I’m going to change the yellow baseball cap to a pink one.
I’m also going to delete the character reference, as in the original picture he was wearing a and orange hat, and this will likely confuse MidJourney.
Hit submit and let’s check it out.

You can basically change anything about your character like this, just be sure to remove the character reference image, as that will prevent most changes from appearing.
Let’s do one more example, but change a bit more than the hat.
I’m going to use this image of our character playing tennis.

He’s not exactly wearing a tennis outfit, so I’m going to change that.
Click the editor, paint out his current outfit then I’ll adjust the prompt to a white tennis outfit and click submit.

Now our character looks like he’s meant to be in this scene.

Ok, we’ve made some photos with a consistent character, and we know how to edit our character, but what happens if we have 2 characters that need to look the same across multiple images.
Well, this is where things get a bit confusing, but it’s definitely possible.
How to Get Multiple Consistent Characters
We’ve learned how to get a consistent character in MidJourney…
But, let’s say I want to add another character to a scene with the boy I made.
Fortunately, that’s very easy to do.
I’ll quickly generate a character using the prompt template we discussed earlier.
Prompt: A long shot of a 12-year-old girl, of average height and build, with long blond hair and green eyes, wearing a yellow dress, standing in a park. Disney Pixar style.
I’ll now upscale the image and download it.

Great, we’ve not got 2 characters that we can use.
Let’s create an image of our two characters sitting on a park bench.
Let’s upload both reference images, select character reference for both, and type in our prompt.
What you want to do is combine the two character reference prompts, and include what they are doing in the middle.
Essentially it’s [character reference prompt A] [doing X with] [character reference prompt B].
So in practice, this would look like:
A 12 year old boy, of average height and build, wearing a light blue jumper and shorts and plain yellow hat, sitting on a bench with a 12 year old girl, with long blond hair and green eyes, wearing a yellow dress. Disney Pixar style.

I’m going to put this into mid-journey and let’s see what we get.

As you can see both of our characters are in the scene.
How to Change the Style of Your Character
So, for all of our images, we’ve used a Disney Pixar style, but what if we want to change the style of our characters?
That’s pretty easy to do and there’s a couple of ways we can do this.
The first is to simply type the style that we’re looking to achieve.
Again, we select our character reference image, and selectthe character reference icon.

So I’ll type in my prompt and change the style, I’ll go for a 1990’s anime style:
A 12-year-old boy, of average height and build, with short dark hair and brown eyes, wearing a blue jumper and shorts with a plain yellow baseball cap, sitting on a park bench eating a sandwich. 1990’s anime style.

As you can see, the style has completely changed, whilst still retaining the character design.
The other way we can change the style is with a style reference image.
I’ve saved a screenshot from a 1990’s Pokemon which I’ll use.

Let’s paste in our prompt again, but not include anything about the style.
Prompt: A 12-year-old boy, of average height and build, with short dark hair and brown eyes, wearing a blue jumper and shorts with a plain yellow baseball cap, sitting on a park bench eating a sandwich.
I’m going to select my character reference image, and make sure the character reference icon is active.
Then, I’ll upload my style reference image, and select the style reference icon, which is the paperclip.

Let’s hit enter and see how it looks.
Great, as we can see MidJourney has taken the style from our reference image, whilst still keeping the character the same.

It’s also worth mentioning here that we can use the style weight parameter to control how influential our style reference is. This is expressed as –sw
The style weight parameter goes from 0-1000 with 1000 being the most influential.

Animating Your Character
If you want to animate your newly created MidJourney character, then there are a few tools I’d suggest:
I’d recommend reading our full guide on how to animate MidJourney images for a detailed breakdown.
Wrapping Up
Well, there we have it.
I hope that you’ve got a better understanding of how to create a consistent character in MidJourney!
Of course, if you have any questions at all, please feel free to comment down below.
Catch you in the next one.
